Sequencer
Sequencer
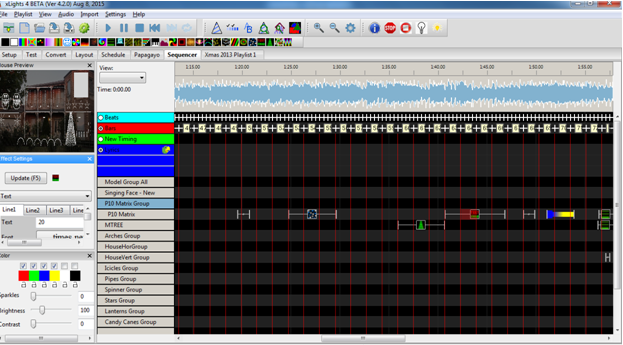
The sequencer is where the majority of time will be spent and where most of the functionality that the user sees resides. The main areas and functions of the Sequence tab are as follows:
Windows
On the left hand side of the sequencer, a list of open Windows are displayed. To select additional Windows, click on View, Windows and select the windows that you wish to have displayed, if the window is not open.
You can close a Window or move them around or if you have an additional monitor configured, then one or move Windows can be moved to the alternate monitor.
You can save the windows that you normally have open as your default perspective. These windows will then be opened when you load xLights.
Timing Tracks
xLights/Nutcracker can support multiple timing tracks on the sequencer, each with different frequencies of timing marks. By default, a timing track ‘New Timing’ is created for each sequence if you have not created one when creating a new sequence.
Timing Tracks can be added via the Settings , Sequence Settings , Timing Tracks menu. Then select a new Timing Grid.
When you create a timing track it gets added to all views that you have defined. Timing tracks are local to a sequence.
The timing marks create a grid but once the effects are dropped they have no relation to the original timing marks that were used to drop them. You can switch to any other timing track and have a completely different grid.
If you have multiple timing tracks defined,
- Each timing track has a different color of timing marks.
- You can select the timing track radio button (to the left of the timing track name) to enable that track. You can also select more than one timing track to be displayed at the same time, however only one timing track will be active for effects to calculate the start and end position.
You can set up timing marks on any timing track manually, by placing your cursor on the waveform (above the grid) and while playing the sequence, press the ‘t’ key where you wish the timing mark to appear. You can add new timing tracks or delete an existing timing track at any time. You can also import timing marks created externally (the most common being those created via Audacity). In order to do this, right click on a timing track, and select Add Timing Track or Delete Timing Track. To import one that has been created externally, select Import Timing Track, navigate to the .txt file containing the timing track and click OK to import it.
Models
A model in xLights/Nutcracker defines the entire required characteristic about a single physical element of your display. Typically it will represent a common item such as an arch, a matrix, a straight line, flood light as well as more esoteric and custom made items such as singing trees, candy canes, a snowman etc.
It defines the type of lights, the number of channels and other characteristics required to render the sequence data. When a model is defined, it is retained in an xLights/Nutcracker configuration .xml file in the show directory. It can be reused for all subsequent sequences – however it needs to be added to the sequence grid of each sequence as required in order for effects to then be sequenced against the model.
A model is made up of one or more strands, and each strand is made up of one or more nodes.
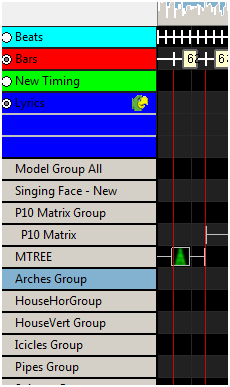
To define a model, after opening an existing sequence or creating a new one,
- Click on the Models icon on the top row of the canvas or
- Click on the Models button on the Layout window
- Right click when in the sequencer window, select Edit Display Elements and then Add Models
Clicking on the Models icon, the model list window will display any existing models that have already been defined.
Timeline and Waveform
The top section of the display window is the Timeline section and indicates the scale that the waveform and sequencer is displaying.
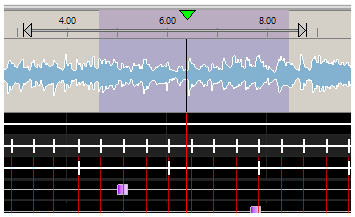 You can select an area on the timeline – depicted by the arrows - and you can then play that section once independent of the section highlighted to be played on the waveform. At the end of playing that section, the highlighted arrows disappear, leaving the waveform highlight to be played. Clicking anywhere in the timeline or highlighting an area in the timeline initiates auto play, without losing the waveform selection.

The waveform displays a sonographic representation of the audio portion of the media that has been associated with the sequence.

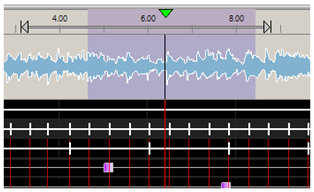 You can control the focus of the waveform.
- Zoom in on the waveform by double clicking on the waveform. Keep double clicking until you've got a zoom setting you can use. Or click on the ‘+’ button.
- To zoom out, hold the shift key and double click on the waveform or click on the ‘-‘- button.
When playing the sequence, a vertical line indicates the start position and another vertical line extending right through the grid indicates where the audio being played current is. The time counter displays the time from the beginning of the sequence that the current position is up to.
You can highlight a range on the waveform to play only that section. If you move your cursor on the waveform towards either edge of the highlighted area, a ‘hand’ appears and you can use that to move the edge.
- If the Pause button is selected, and then pressed again, the sequence will restart from the current position that it stopped at.
- If after a Pause, if the Play button is pressed, then the sequence will restart from the marked ‘start position’.
- Clicking on the Stop button will reset the start position to the beginning of the sequence.
- After Stop has been pressed the Rewind button will start from the beginning of the sequence and the fast forward button will play from the last component of the sequence.
- Highlighting a portion of the waveform will cause only that section to be played. Pressing the spacebar will replay that section.
- The ‘Replay’ button does not currently drive any functionality.
Clicking on an effect in the grid will not alter the waveform area that has been highlighted to be played. The effect becomes the focus point, if you zoom in and out, but the play range does not change. If you do want the start position to move to where your effect is, or to be based on the edit position in the grid, then double click in the grid and that will then remove any highlighted position/area in the waveform and set the start position in line with where you have double clicked.
Views
A view is used to be able to easily select a list of models and the sequence in which they are to be displayed on the sequencer.
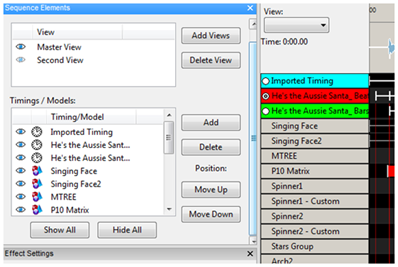 Views work across sequences, so once you have setup a view with the models that you require, if you open any sequence, that view is available to use in that sequence.
If you define Model Groups in a view, then when you use the view in the sequencer, you will be presented with a list of the groups. Double Clicking each group will open up the list of models within the group.
Multiple views can be defined, with each view defining a list of models that are to be displayed and the sequence that they should be displayed in. For example:
- A ‘Static Model’ view may contain all elements that are non RGB.
- An ‘Import Model’ view may contain only elements that you wish to sequence after importing other data from other sequencers.
- A ‘Halloween Model’ view may contain only elements that you wish to sequence for Halloween.
New models can be added to a view by selecting that view from the Views window within the Sequence Elements window (or from the View window to the left of the Waveform) and clicking on Add Models.
Similarly models can be removed from a View by highlighting the model in the Model window within the Sequence Elements window and clicking on Delete Model. The position that the model appears within the view can be changed by highlighting the model and clicking on Move Up or Move Down. Within each view, the models that are part of the view can be marked as visible or non visible via the button to the left of the model.
Note: The visibility is across all sequences and not specific to the sequence that is open. So if you make a model non visible, it will become non visible in all sequences.
The Master View is a special (system created) view. It contains all the models that have been defined for the sequence that is open only i.e. it does not span sequences. It also determines the rendering order. Any model added to any other view when a sequence is open automatically gets reflected in the Master View of that sequence. Models can be deleted (i.e. removed) from any view at any time.
Note: If you attempt to delete a model from the Master View, you will be prompted to confirm the deletion, as deleting the model from the Master View will remove all effects that you have created against that model for the sequence that you have open.
If you add a Timing Track to a view , it will be added to all views that you have defined.
