Difference between revisions of "Quick Start Guide"
| Line 30: | Line 30: | ||
<div style="background-color:#f9f9f9; border: 2px #5C92BC solid;margin:0px; padding-left:1em;padding-right:1em;margin-bottom:1em"> | <div style="background-color:#f9f9f9; border: 2px #5C92BC solid;margin:0px; padding-left:1em;padding-right:1em;margin-bottom:1em"> | ||
| − | + | # Click on the New Sequence Icon [[Image:QSG-NewSeqIcon.png]], or (Select File, New Sequence [[Image:QSG-NewSeqMenuBar.png|thumb|50px]]) and follow the outline described in New Sequence. | |
| − | + | # Click on the Sequencer tab and if you have not already done so, either create default timing marks say every 5 seconds or create a Timing Track via the Settings , Sequence Settings, Timings tab. Alternatively, just to get going quickly, you can set the default ‘New Timing’ timing mark off by unticking it. This will enable you to drop an effect anywhere. Note: You need to either select a Timing Track with some timing marks on it or deselect all the Timing Tracks, to be able to drop an effect on the sequencer grid. | |
</div> | </div> | ||
Revision as of 02:25, 25 August 2015
This section describes the steps required to use xLights/Nutcracker for the first time to create a sequence. Expanded details of each section can be referenced for more information and in-depth instructions.
Download and Install xLights
- Download and Install the latest version of xLights, selcting the defaults.
- The latest versions as well as more information on the install process is located on the Software Releases page.
Setup
- The Setup page will instruct you how to setup the Show and Media directories as well as the Lighting Network.
- Show and Media Directory
- The Show Directory is where all the required files (sequences, pictures, and user configuration files) to run the sequences are kept. When a sequence (.xml) is saved and a binary file (.fseq) rendered, both files are created in the show directory. This is the same location where the configuration files can be found and the default location where the program will first prompt for, or look for files pertaining to several functions of xLights/Nutcracker.
- The Media Directory is where the required audio (.mp3) and video (.mp4) media files are kept. The media directory, by default is located in the same directory as the show directory, but can be different to the show directory by user preference.
-
- Lighting Network
- At this stage, the actual network does not matter as you can change the details later.
- You can click "Add Null" and define a block of say 10,000 channels to work with (ensure that this is larger than what you will have in all your models) or you can define them as E1.31.
- For E1.31, click the Add E1.31.
- Select Multicast, Starting Universe # = 1, #of Universes = 10, Last Channel = 512, and press okay. This will create 10 universes, each of 512 channels starting from Universe 1 to Universe 10. The start and end channels are automatically calculated and displayed in the last column.
- Click on "Save Setup" to save the network created.
-


New Sequence
- Click on the New Sequence Icon
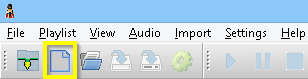 , or (Select File, New Sequence ) and follow the outline described in New Sequence.

- Click on the Sequencer tab and if you have not already done so, either create default timing marks say every 5 seconds or create a Timing Track via the Settings , Sequence Settings, Timings tab. Alternatively, just to get going quickly, you can set the default ‘New Timing’ timing mark off by unticking it. This will enable you to drop an effect anywhere. Note: You need to either select a Timing Track with some timing marks on it or deselect all the Timing Tracks, to be able to drop an effect on the sequencer grid.

Create Models
- Define a model. Each model type is described in the Models section, however to get going, click on the Models icon and from the Models list window, click New and on the Model window that pops up, enter the following information:
- Model name – P10 Matrix (example)
- Display – Horiz Matrix
- Type of String – RGB Nodes
- Actual # of Strings – 50
- # of RGB Nodes per String – 50
- # of Strands per String – 1
- Start Channel – 1
- From Output – 1
- Starting Corner – Top Left
- Part of my Display – Tick
- Model Brightness Adjustment – 0
- Click OK to save the model
- Add a model to the sequencer.
- Define a model. Each model type is described in the Models section, however to get going, click on the Models icon and from the Models list window, click New and on the Model window that pops up, enter the following information:
Sequencer Tab
From the sequencer tab, with the cursor on Timing Track section to the left of the sequencer grid, right click and select Edit Display Elements.
From the Sequence Elements pop up window, select Master View and click on Add Models. Select the Matrix model created, Click on Add, then close the two windows.
You should end up with a model added to the sequencer.
Select an Effect (as an example - the Butterfly effect) from the Effects grid and drag it to the sequencer. Click on the Render all button . Click on Play to start playing the sequence. The effects should display in the Model Preview Window if it is open or in the House Preview Window if that is open. Click on the Save Icon to save the sequence and give it a name when prompted.
| |
TIP: To Open and select Windows, click on View, Windows and select the Window(s) that you wish to have open. | |
Next, click on the Layout tab. Click on the Save button below the Models button. Model Groups are described in the Model Groups section , however to get going, click on Select Model Groups, Edit Group, Add Group. Replace the ‘New Model group’ with a name such as ‘All Models’. Then select the model ‘P10 Matrix’ that you created above. Use the right arrow to move it to the ‘Models in Group’ section. Click on Update Group and then Close. Ensure that the ‘All Models’ Group is selected in the Model Groups window , then click OK to return to the Layout screen. Position the P10 Matrix model on the layout as required by dragging and adjusting it (described in the Layout section), and then click on the Save button (on the left side below the Models button) to save the Layout details. Return to the Sequencer tab and continue.
| |
TIP: Any model created or changed must be saved first, before it becomes available to be seen on the Layout tab. To avoid confusion, before playing any sequence on the Layout tab , click on Render All and then Save the sequence first. This is not always necessary, but it depends on whether you change any of the default render or save settings. | |
| |
NOTE: Ensure that the MP3 file that you use for your sequences are set to a Constant Bit Rate. Use Audacity and export the audio as an MP3 file with Constant Bit Rate and preferably 128 or 192K. The sequence will play if it is not a constant bit rate, however the audio may not start exactly at the point the cursor is placed on the wave display on the sequencer tab.. | |